Converting PowerPoint into video is a challenge for many presenters, marketers, trainers, students, and teachers.
In a multi-device world, it becomes essential for presentations to be available in different formats. Sometimes we want to convert a presentation into an HD video and upload it to YouTube or stream it online from a personal or business website. Sometimes we want to convert a slideshow into a PDF and share it online. Our ultimate goal is to make presentations easily accessible for more people and boost their discoverability.
When you need a video version of your PowerPoint slideshow, there are several ways to go about this. If you search on Google for the phrase “How to Convert PowerPoint to Video”, you will find, for instance, several programs and websites that can do this, through more or fewer complex processes. Most of these conversion tools are paid while you could find few free options as well.
Paid online presentation converters or software like Camtasia can perform the task, even adding new elements and effects to the final video.
In this article, we talk about few FREE options available to convert your PowerPoint into a video.
1. Convert presentation into a video using PowerPoint – Free
The easiest way is always to use inbuilt video conversion feature in PowerPoint.
When using PowerPoint directly, one thing you may want to do before saving a presentation into a video file, particularly for online streaming, is adding a narration or pointers to mimic a live experience.
To record narration or pointers, use the “Record Slideshow” option under the “Slideshow” tab. Then check the “Narrations and laser pointer” box.
Once ready to save the finished presentation, here’s how to convert PowerPoint to video.

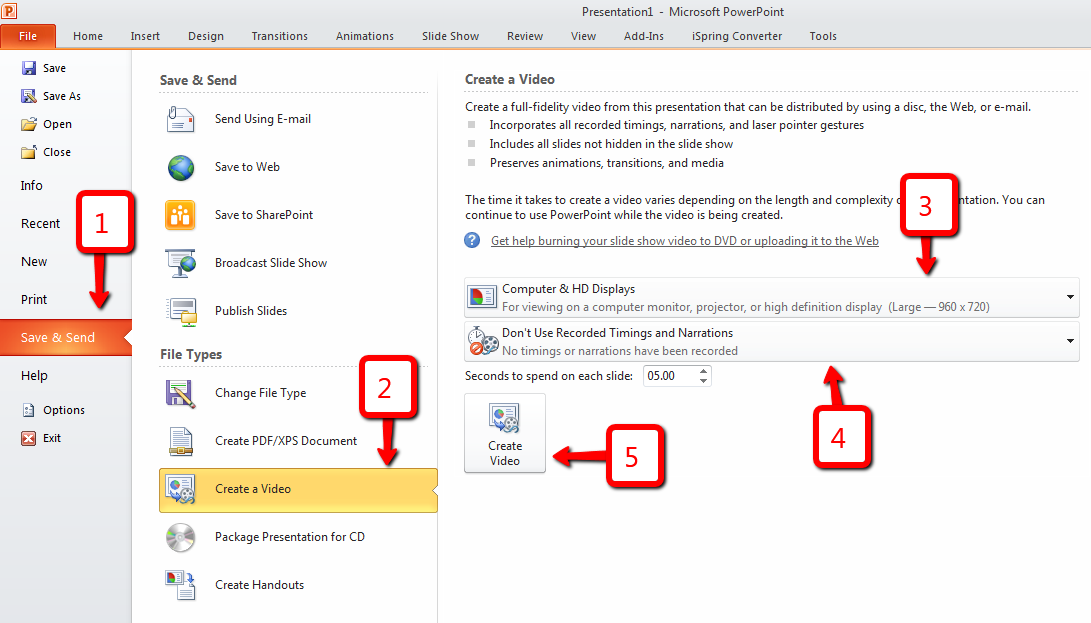
- In the ‘File’ menu, choose ‘Save & Send’. (In PowerPoint 2013 version choose ‘Export’ )
- Then click ‘Create a video’.
- Set the video quality settings as ‘Computer & HD Displays’. I recommend selecting this option no matter the purpose of your video. It will produce an HD quality video output which is the accepted standard nowadays.
- Then check or uncheck ‘Don’t Use Recorded Timings and Narrations’ to use or discard them.
- Finally, click ‘Create Video’ to save it.
2. Use Authorstream to convert PowerPoint into video

Authorstream is a PowerPoint presentation hosting service. Your PowerPoint files can be uploaded, using a Facebook account or a website login.
Once logged in, click the yellow ‘Upload PowerPoint’ button, then ‘Upload from Desktop’ to select a finished PowerPoint presentation.
On the next page, you will be asked to fill in the presentation’s information before clicking ‘Upload Now’.
When the process is finished, an email notification will be sent with a link to stream it or convert it to .mp4, using the ‘Convert Video’ option.
3. Convert PowerPoint into video using Movie Maker

This is actually a quite complex process. Each slide of the PowerPoint needs to be saved as an image first. From the ‘Save As ’ drop-down menu select ‘JPEG File Interchange Format.
Then click Save. Your slides will be saved in a new folder as JPG images.
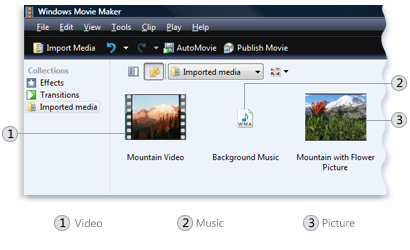
In a new Movie Maker project, then, add the images into the ‘Storyboard’, using the ‘Import Images’ option in the Movie Task view.
Effects, slide transitions, titles, and credits can be added to the presentation video then, before saving it by choosing the appropriate option under ‘Finish Movie’.
My Recommendation
We talked about three ways of how to convert PowerPoint into a video. Certainly, it is difficult to recommend a single program as the best option for all. Using certain programs can achieve better output files than others under different setups.
If you need a good quality video file but no need to add extra effects or elements, I recommend saving your presentation as a video file directly from PowerPoint itself. You will avoid installing more software and going through several, often time-consuming, unnecessary steps.
If you are looking for advanced production, for example, including perfect narration, multiple video layers, cursor effects, zoom and pan effects and background music, etc. use Camtasia. Screenflow is another option for MAC. Camtasia is a paid program but worth the investment if you frequently convert PowerPoint files into videos. At Slidehelper, we use it to create video previews of our PowerPoint templates.
If you found this article useful, we love to see your comment below. If you have any questions about converting your PowerPoint presentation into a video, feel free to ask. Maybe you are aware of better options and love to share. Feel free to post all of them below. Finally, don’t forget to share this helpful information with your friends on Facebook, Twitter, and Google+.
Merry Christmas!


